

Blogging Marathon# 27: Week 4/ Day 7
Theme: Miscellaneous - Wilton Decorating Course 1 - Class 4
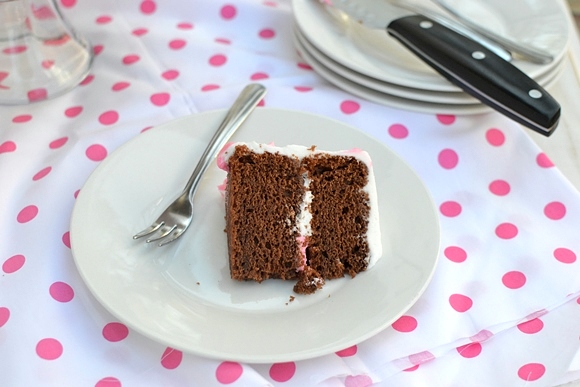
Dish - Eggless Chocolate Cake
I made this Eggless Chocolate Cake from King Arthur flour site. This is a very easy to make recipe, just mix everything together in the baking pan, bake and serve right from the same pan. But since I was going to decorate the cake, I mixed the ingredients in another bowl and baked in greased baking pans.I doubled the recipe and made 2 cakes to make the 2 layers.

Theme: Miscellaneous - Wilton Decorating Course 1 - Class 4
Dish - Eggless Chocolate Cake
It is the last day in April which means it is the last and final day of our Blogging Marathon# 27. Kudos to the entire group for successfully completing this challenge and thanks to Valli for being the best organizer as ever.
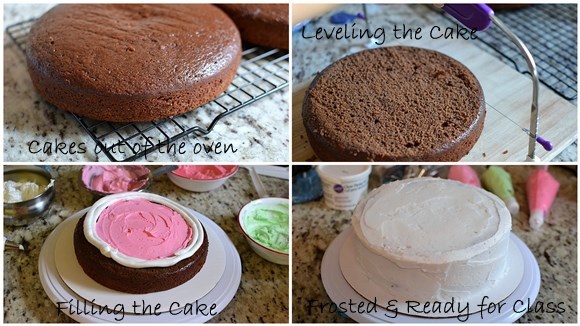
Coming back to my Wilton decorating course, for 4th class we had to bring a cake that was torted, leveled and frosted ready to decorate. Final class was dedicated to making roses and writing/ printing on the cake -- all the final touches for a good looking cake.

As I mentioned in my previous post, I was the only student left in the class and I had the undivided attention of the instructor. I'm not sure if this was good or bad, since I felt like an unfocused 5 year old making these roses. There are about 10 things that need to be remembered while making the roses like right hand should be steady, hold the tip at a certain angle, rotate the flower nail in one direction and so on. I kept forgetting one instruction after the other much to my chagrin. Oh well, finally I got the hang of it, but my roses where nowhere as cute as the instructor's. I need to practice a little more on my technique.

As I mentioned in my previous post, I was the only student left in the class and I had the undivided attention of the instructor. I'm not sure if this was good or bad, since I felt like an unfocused 5 year old making these roses. There are about 10 things that need to be remembered while making the roses like right hand should be steady, hold the tip at a certain angle, rotate the flower nail in one direction and so on. I kept forgetting one instruction after the other much to my chagrin. Oh well, finally I got the hang of it, but my roses where nowhere as cute as the instructor's. I need to practice a little more on my technique.
 |
| My attempt at making perfect roses, which is still Work in Progress |
 |
| One of my nicer looking Rose |
I made this Eggless Chocolate Cake from King Arthur flour site. This is a very easy to make recipe, just mix everything together in the baking pan, bake and serve right from the same pan. But since I was going to decorate the cake, I mixed the ingredients in another bowl and baked in greased baking pans.I doubled the recipe and made 2 cakes to make the 2 layers.

Ingredients:
All-purpose Flour - 1½cups
Sugar - 1cup
Unsweetened Cocoa powder - ¼cup
Salt - ½tsp
Instant Espresso powder - ½tsp (optional)
Baking Soda - 1tsp
Vanilla extract - 1tsp
Vinegar - 1tbsp (I used apple cider vinegar, but any vinegar should work)
Vegetable Oil - 1/3 cup
Milk - 1 cup (I used vanilla soymilk, but any regular dairy milk or other non-dairy milk or even water would work)
Method:
 Here's my final cake. I don't like the colors I chose and my writing is too small in proportion to the cake size. All these I guess come with experience.

Lets check out what my fellow marathoners have cooked for the final day of BM# 27.
Sugar - 1cup
Unsweetened Cocoa powder - ¼cup
Salt - ½tsp
Instant Espresso powder - ½tsp (optional)
Baking Soda - 1tsp
Vanilla extract - 1tsp
Vinegar - 1tbsp (I used apple cider vinegar, but any vinegar should work)
Vegetable Oil - 1/3 cup
Milk - 1 cup (I used vanilla soymilk, but any regular dairy milk or other non-dairy milk or even water would work)
Method:
- Preheat oven to 350°F. Grease a 8" round baking pan (make sure that the pan is at least 2" deep) or a 9" round pan.
- In a large bowl, combine all the dry ingredients.
- In a large bowl or measuring cup, measure all the wet ingredients. If using instant espresso ;powder, whisk it into the liquids.
- Add the wet ingredients to dry ingredients; mix until combined, but don't over mix.
- Pour the batter into the prepared baking pan, bake for 30-35 minutes or until a cake tester/ toothpick inserted into the center comes out clean.
- Let cool in the pan for 10 minutes before inverting onto a wire rack to cool completely. Frost as desired.


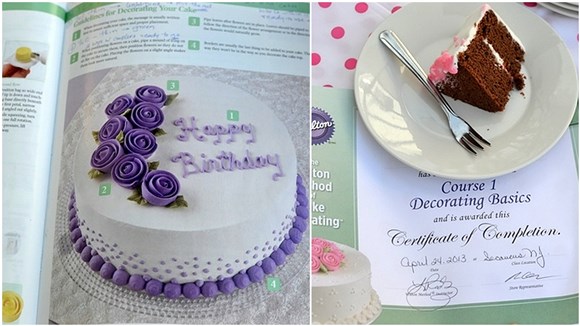
Here's the cake I was supposed to make and my certificate of completion from Wilton. I'm sure you will be seeing my creations (or failures) here in the near future.

Here are my previous posts on Wilton Decorating Course1:
- Class 1: Chocolate Cookies
- Class 2: Eggless Vanilla Cake & Wilton Butter-Cream Icing
- Class 3: Eggless Chocolate Cupcakes
Lets check out what my fellow marathoners have cooked for the final day of BM# 27.

Beautifully made just like a pro.
ReplyDeletePavani those flowers are so cute and surely not like a first timer..you have natural talents and it surely shows. Thanks for sharing this with this, will be great help. It's been a fantastic non stop blogging from you and I enjoyed each and everyone of the post. Kudos to your efforts!
ReplyDeleteOMG..it looks beautiful..
ReplyDeleteWow its so so so beautiful. Please your instructor must have had years of practice before he/she could make them effortlessly. These are beautiful.
ReplyDeleteThanks for the BM I enjoyed myself.
Perfectly made roses,looks so beautiful...by the way the black box which I used in my picture is a facial tissue box holder...
ReplyDeleteYou are fabulous baker Pavani, those rose looks damn cute..Beautifully decorated cake.
ReplyDeleteThey look cute, at least to amateurs like me. :)
ReplyDeleteI am going in the reverse order and haven't checked the older posts yet. How was your experience with the class?
Those flowers look so gorgeous!
ReplyDeleteWow.. what a cake... its look more beautiful than book :)
ReplyDeletewow!!!Want to learn these roses....looks gorgeous
ReplyDeleteAwesome...where do you live ? How was your class went ? I am trying to join.
ReplyDeletePavane, I loved each and every one of your posts and it was great running the BM with you!
ReplyDeleteI the roses look beautiful and as a whole don't look as if done by a novice decorator...the letters could have been bigger, but again like you said it will come with practice.
ReplyDeletePerfect roses pavani. Me too tried the same cake for final class about 4 to 5 years back.
ReplyDelete