Cook's Hideout: Cooking Show
Showing posts with label Cooking Show. Show all posts

November 02, 2013

Poushtik Moti (Seasoned and spiced Rice balls)

Wish you All a very Happy Diwali..
Hope everyone is enjoying the festival. Today's post is going to be short because I've to cook for Diwali lunch, then attend an early Thanksgiving party in the evening. Too many things going on in the head and in the kitchen, so I'm going to keep this post short and simple.
This dish is perfect for days like the one I'm having today. Too many things going on and suddenly you realize that you have only sweet dishes and forgot to make the savory dish. You also don't want to make anything deep fried, then this dish is perfect for you.
Poushtik Moti (Seasoned and spiced Rice balls)

April 18, 2013

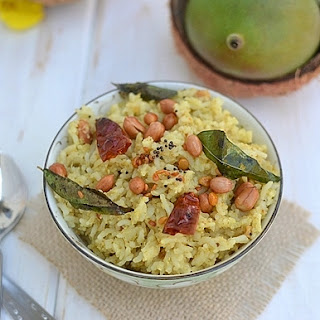
Mango Masala Rice

Blogging Marathon# 27: Week 3/ Day 3
Theme: Seasonal Dishes - Summer Entree
Dish: Mango Masala Rice
After Spring (March - May) comes Summer (June - August), the funnest of all seasons in terms of outdoor activities are considered. Great season to have some fun in the sun, picnics in the park, barbecues, visits to the lakes/ beaches etc. All in all wonderful time to enjoy with family and friends.
Summers also mean mango season. We get mangoes all through the year here in the US, thanks to the imported mangoes from Hawaii and other tropical countries. But I think the best mangoes are available only in the summer. Indian stores are stocked with juicy, sweet mangoes and we always end up with big crates of these yellow beauties even though it's just the 2 of us who eat them in my family. 
Mango Masala Rice
So for today's Summer seasonal recipe, I made this tangy and slightly spicy Mango Masala Rice. Recipe courtesy from one of the Telugu cooking shows that I'm practically obsessed with these days. This dish is almost like mango pulihora with some added spices to give the kick. Do try when you get good raw mangoes.

September 09, 2009

Tomato & Cheese Tart

Why does summer go so fast and winter seems to linger foreveeeeer??? But I’m not complaining, I like fall (and even spring), get to see the gorgeous changing colors. I hope we can take some time and visit some scenic place with beautiful fall colors. Are you reading this Mr. H??
Anyway coming to the recipe, I watched Ina Garten make it on FoodTv in the afternoon and I made it for our evening snack that same day. This is probably the first time ever that I made a recipe so quick after watching the show. The only change I made was the type of cheeses used, Ina used parmesan & feta; I used asiago & mozzarella. For the original recipe, click here.


Recipe adapted from Ina Garten’s Back to Basics
Ingredients (makes 4 5” tarts):
Puff pastry sheet – 1, thawed according to pkg instructions
Onion – 1 large, thinly sliced
Garlic – 2-3 cloves
Thyme, fresh – 1 tsp
Tomato – 1 medium, cut into thick slices
Asiago cheese – ¼ cup, grated
Mozzarella cheese – 2 tbsp, grated
Salt & Pepper – to taste

Method:
  • Preheat oven to 425°F.
  • Heat 1tbsp oil in a skillet; add onions and garlic and sauté on medium flame until lightly caramelized.
  • Add thyme, salt and pepper and cook for another 2 minutes. Remove from heat and set aside.
  • In the meantime, open the puff pastry on lighly floured surface and roll it into 11”x11” square (approximately). Using a 5” round plate (I used a small steel plate) as your reference, cut the pastry into 4 circles with a sharp knife. Place the circles on a parchment covered baking sheet; then score a ¼” border around each pastry circle, this will create the slightly raised edge to the tart once baked.
  • Prick the pastry inside the scored line with a fork and sprinkle 1tbsp asiago cheese in the inner circle.
  • Place ¼ of the onion mixture in the center (inner circle), sprinkle mozzarella cheese and place a slice of tomato in the center of each tart. Sprinkle the tomato with salt and pepper. Finally using a peeler, make big shards of asiago cheese on top of the tomato.
  • Bake for 20-25 minutes or until the pastry is golden brown. Serve hot or warm.

Signature

May 21, 2008

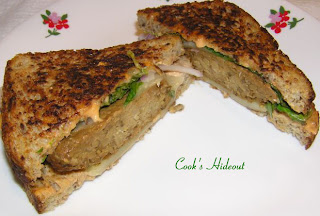
Tempeh Club Sandwich

I’ve recently started venturing into different types of soy products and gluten (seitan, I made seitan from scratch two ways: boiled & baked, will post about them soon).
I cooked with tempeh once before, but didn’t like it much. Recently I watched Toni Fiore cook with tempeh on Delicious tv and decided to give it a try. I loved it so much that I made it twice in 3 days.

Recipe adapted from here.
Ingredients (makes 4 sandwiches):
For Barbequed Tempeh
Tempeh – 1 pkg (I used three grain variety)
Tamari – ¼ cup
Apple cider Vinegar – ¼ cup
Maple Syrup – ¼ cup
Vegetable oil – 4 tbsp
Ground Cumin – 1 tbsp

For the Sandwich:
Bread Slices – 8
Romaine Lettuce – 4 leaves
Red Onion – 1 small, thinly sliced
Swiss Cheese slices – 4
Russian Dressing – 4 tbsp (I mixed ¼ cup of mayonnaise with 2tbsp ketchup and 1tsp of hot sauce)
Oil/ Butter/ Margarine – for brushing on the bread

Method:
  • Preheat oven to 350°F.
  • Slice the tempeh into four pieces. Lay the tempeh in a baking dish. Mix all the marinade ingredients for bbq tempeh in a small bowl and pour it evenly on the tempeh.
  • Cover with foil and bake for 30-35 minutes. Check after about 20-25 minutes and if most of the marinade is absorbed, remove the foil and continue baking till tempeh absorbs almost all the marinade, but is not too dry. Remove and let cool a little bit.
  • To make the sandwich: Make an assembly line of sliced onions, tomatoes, cheese, tempeh, bread, lettuce and the spread.
  • Heat a heavy skillet on medium for grilling the sandwich. Layer the bread with lettuce, onions, tomatoes, tempeh and cheese. Top the cover slice with dressing.
  • Drizzle the skillet with little oil, swirl around and place the sandwich. Grill for about 4-5 minutes till the bread is nice and toasty. Flip and grill the other side.
  • Serve hot with a side of salad. It’s very filling and yummy!!!
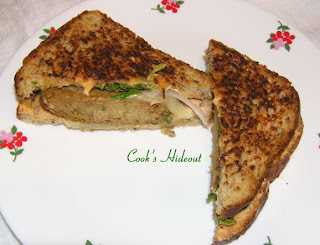
This is my entry to Anupama’s Sandwich festival 2008 and to Sara’s WCC-28 TV Cooks.

December 19, 2007

Coconut Milk Kadhi

This recipe is from Indian super chef Sanjeev Kapoor's cooking show "Khana Khazana". This kadhi uses coconut milk instead of yogurt or buttermilk. Since my husband does not eat any yogurt based products, I wanted to try this for him. The dish turned out delicious and my DH liked it too.

Ingredients (makes about 4-5 servings):
Coconut milk - 2 cups (I used canned Lite Coconut milk)
Besan (chickpea flour) - 2 tbsp
Turmeric - 1/2 tsp
Salt - 1 tsp
Mixed Vegetables (Potato, carrot, cauliflower, red pumpkin, broad beans etc) - 1 cup

For Tadka:
Mustard seeds - 1tsp
Cumin seeds - 1 tsp
Urad dal - 1 tsp
Red Chilies - 4
Curry leaves - 6

Method:
  • Whisk in besan, turmeric and salt in coconut milk and keep aside. Make sure there are no lumps.
  • Microwave or boil the veggies till tender.
  • Heat 2 tsp oil in a saucepan, add the tadka ingredients and after the seeds splutter add the veggies and cook for 5 minutes.
  • Slowly add the coconut milk mixture. On slow flame, simmer the kadhi for about 5 minutes or until the mixture does not smell raw anymore.
Serve with steamed rice.

LinkWithin

Related Posts Widget for Blogs by LinkWithin
Blogging tips