Cook's Hideout: April 2011

April 24, 2011

Sheermal-Sweet Yeasty Indian Bread

Hope you are having a fun Easter Sunday. We went to Hershey Park yesterday and it was interesting to watch the whole process of cocoa beans turning into chocolate bars. Bought a lot of chocolate and kids had a blast on the roller coasters. Personally I'm not a roller coaster person, I'm happy watching everyone scream and have fun, I don't want to do it myself. It was a great Spring day to be out and about enjoying the weather and having fun.

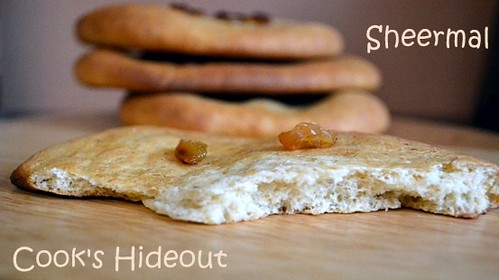
Sheermal

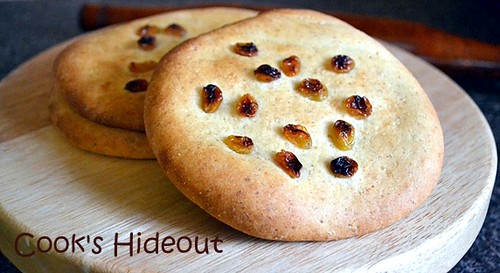
For the last day of Blogging Marathon, I made these slightly sweet and yeasty bread called Sheermal. To me, the name sounds more like a porridge kind of a dish and not a bread. But apparently this is a sweetened naan made in the tandoor or an oven. I made these for lunch and served them to my son with some nutella spread on the top and he enjoyed it a LOT and called it "SWEET PIZZA". I have to say, these bread are very easy to make and the end result is soft, yeasty sweet bread that is awesome by itself or with some Almond Kheer like Yasmeen did here.

Thanks to Valli for organizing this marathon and looking forward to participating in the future marathons.

Recipe adapted from India Curry.

Ingredients:
Yeast - 2¼ tsp (0.25oz. pack)
Granulated Sugar - 1tsp
Milk - ¼cup
Salt - ¼tsp
All-purpose Flour - 1 cup
Whole wheat pastry flour - ½ cup (or just use 1½ cups of All-purpose flour)
Ghee - 2tbsp
Powdered Sugar - 2tbsp
Saffron - 6 strands
Egg - 1
Golden Raisins - for garnish

Method:
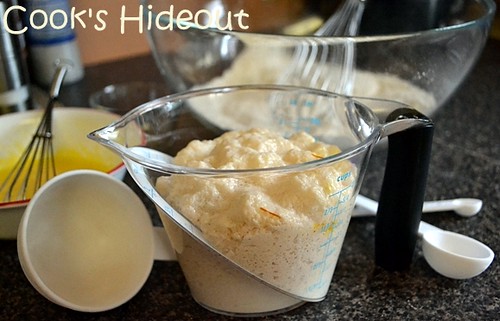
  • Mix yeast, granulated sugar, saffron and warm milk (at 100 to 110°F) in a measuring cup. Set aside.
  • Whisk egg and melted ghee in a small bowl.
  • Whisk flours, salt and powdered sugar in a large mixing bowl. Make a well in the center and add the wet ingredients. Mix well to form smooth dough. Add water if needed.
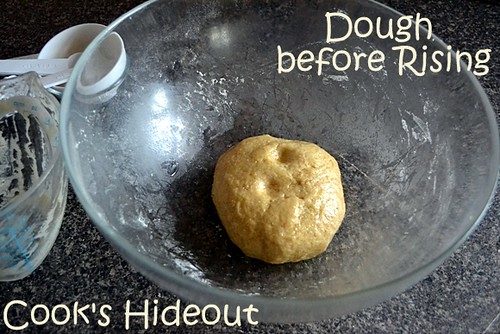
  • Knead for about 10 minutes until the dough is soft and supple. This dough is very easy to handle and is great to work with.
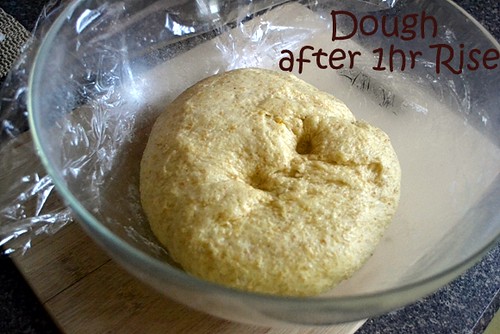
  • Cover with plastic wrap or kitchen towel and allow to rise for about 1 hour or until doubled in volume.
  • Preheat oven to 450°F.
  • Knead dough again and divide into 6 equal parts.
  • Roll each part into 5" disc and place raisins on the top. Press lightly.
  • Bake on a greased baking sheet for 6-8 minutes or until golden brown spots are formed.
Serve hot and Enjoy!!

Here's a Pictorial:

Foamy yeast1

Sheermal dough

Raised dough

Sheermal1

Sheermal4

Lets see what my fellow marathoners BM#4 have been cooking up today.

Diabetes Diet/Management: Kamalika, Smitha, Suma
Kid Friendly Recipes: Anusha, Cool Lassi(e)
Seven Days of Soup: Priya Suresh
Seven Days of Indian Bread: Jayasree
Seven Days of Cakes:Priya Vasu
Seven Days of Preserves: Gayathri Kumar, Vaishali
30 Minutes Meals: Priya Mahadevan, Srivalli

Signature

April 23, 2011

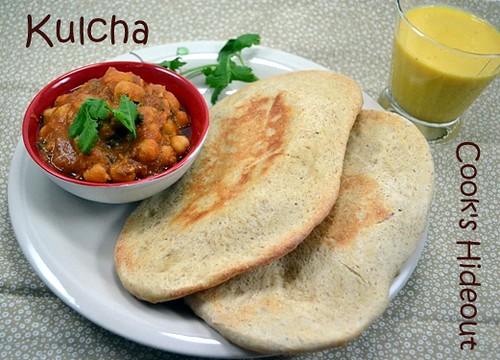
Kulchas

Its the 6th day of the Blogging Marathon and I definitely had a blast making these delicious Indian breads. I also started thinking why I avoid making rotis and I think I can't when I CAN make decent Indian breads. After a lot of thinking, I decided that I don't like making individual portions of anything, I prefer mass production. I don't like making samosas, laddoos or puris, but I love cooking dishes that can feed 4 people without much fuss. That explains why I prefer making a loaf of bread than make 12 rotis for dinner.
Kulchas

Kulcha1
Hopefully after this marathon, I can get over my denial and make Indian breads more often. For today's Indian bread, I made the most frequently asked roti in restaurants, Kulchas. Kulchas are leavened flat-bread made with flour, yogurt, baking powder, baking soda and egg. The leavening principle of kulcha is similar to bhaturas and American buttermilk biscuits. The lactic acid in yogurt reacts with baking soda to make the dough light and rise. The baking powder helps continue the leavening during the cooking. Protein in the egg strengthens the structure of the leavening.

April 22, 2011

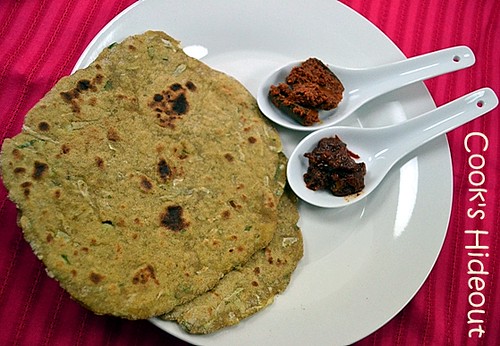
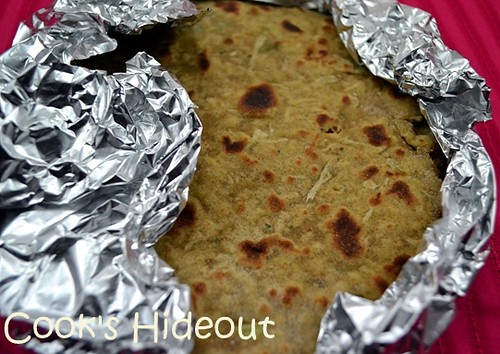
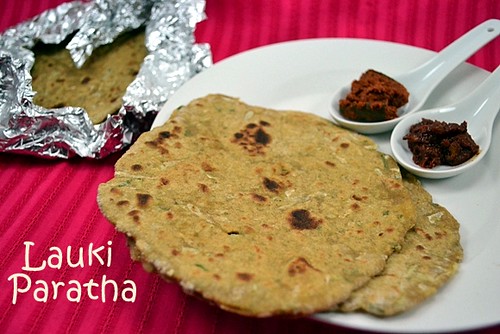
Lauki Paratha (Sorakaya Paratha)

For Day 5 of the Blogging Marathon and I've this healthy and delicious Lauki paratha. I started looking for Roti/ Paratha recipes once I decided to do the marathon and I finalized 7 recipes that I wanted to make. Then I borrowed "Pure & Simple: Homemade Vegetarian Indian Cuisine" by Vidhu Mithal from the library and when I saw the picture of lauki paratha, I wanted to try it for the marathon, so I pushed one of my Puri recipes out and in came this veggie rich paratha.

Lauki Ki Paratha1

I had a rocky start while making this paratha. I added a little more than is needed to make the dough and it ended up very sticky. I tried to add more atta, but it was still too sticky. So I divided the dough into balls and rolled them in lot of atta and then made the parathas. The end result was yummy, slight nuttiness from the besan and mild after taste of the lauki, these parathas were just delicious. I served these to my picky 3 yr old with tomato pickle and he gustily gobbled them up, which is unusual because he eats everything with nutella or jam.

Lauki Ki Paratha

What did I learn: Even if you don't like Lauki, you would LOVE these Lauki parathas.

Ingredients:
Atta - 1½ cups
Besan - ½cup (I used brown chickpea flour for some added fiber)
Salt - ¾tsp
Yogurt - 2tbsp
Lauki (Bottle gourd) - ½lb, grated (about 2-3cups)
Carom seeds (Ajwain) - ½tsp
Cilantro - 2tbsp, finely chopped
Red chili powder - ½tsp
Turmeric - ¼tsp

Method:
  • Sieve atta and besan with salt. Add all the other ingredients and knead to make regular roti dough. Add water as needed to form the dough. Please note that lauki gives out moisture as it sits, so DO NOT add too much water.
  • Keep aside covered for 5 minutes.
  • Divide the dough into 12 equal parts. Dust with atta and roll each ball into 6" disc.
  • Cook on heated skillet (tawa) with 1tbsp oil until light golden brown on both sides. Serve hot.
Lauki Ki Paratha2

Lets see what my fellow marathoners BM#4 have been cooking up today.

Diabetes Diet/Management: Kamalika, Smitha, Suma
Kid Friendly Recipes: Anusha, Cool Lassi(e)
Seven Days of Soup: Priya Suresh
Seven Days of Indian Bread: Jayasree
Seven Days of Cakes:Priya Vasu
Seven Days of Preserves: Gayathri Kumar, Vaishali
30 Minutes Meals: Priya Mahadevan, Srivalli
Signature

April 21, 2011

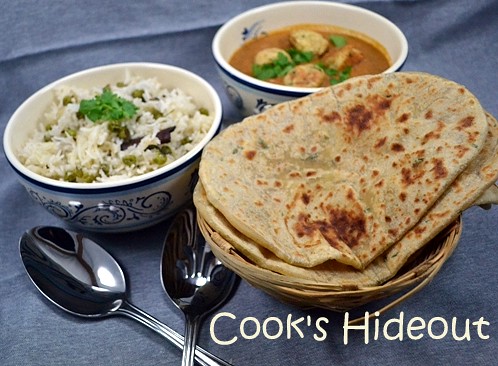
Restaurant style Mughlai Paratha

Today I have a restaurant style Mughlai paratha, it sounds pretty fancy and exotic, but it doesn’t need any special ingredients except for some yogurt and cream cheese. Recipe courtesy India curry and I followed it pretty much to the T.

Mughlai Paratha2

What did I learn: Restaurant style Parathas CAN BE MADE AT HOME.

Ingredients:
Atta (Chapati Flour) – 1 cup
All purpose Flour – 2 cups
Salt – 1tsp
Ghee – 1½ tbsp
Cilantro – ¼ cup, finely chopped
Yogurt – ¾ cup
Cream cheese – ¾ cup, softened (I used whipped cream cheese which doesn’t have to be softened since it’s already whipped)

Mughlai Paratha1
Method:
  • Sift atta, all purpose flour and salt.
  • Add ghee and rub into the flour and mix until it resembles crumbs.
  • Add cilantro and mix well.
  • Blend yogurt and cream cheese into a smooth past and add to the flour mixture.
  • Add water as needed and mix to form smooth dough. Knead for at least 5 minutes. I used my stand mixer to knead and it came out perfect.
  • Cover the dough with damp paper towel or kitchen towel and rest for about 1 hour.
  • Divide the dough into 8-10 equal parts.
  • Roll each dough into 6” round or oval discs and cook them on hot skillet (tawa) until brown spots are formed on both sides, brush with ghee while cooking if desired.
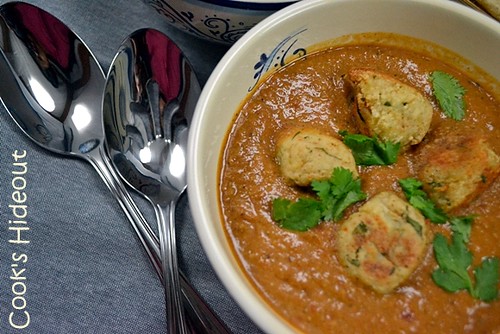
Paneer Kofta Curry

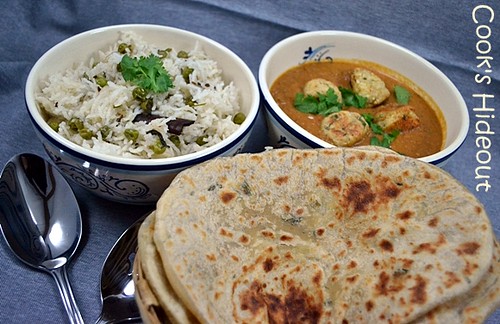
Serve with your favorite restaurant style curry. I served paneer kofta curry and simple peas pulao on the side to make a truly restaurant style dinner.

Lets see what my fellow marathoners BM#4 have been cooking up today.

Diabetes Diet/Management: Kamalika, Smitha, Suma
Kid Friendly Recipes: Anusha, Cool Lassi(e)
Seven Days of Soup: Priya Suresh
Seven Days of Indian Bread: Jayasree
Seven Days of Cakes:Priya Vasu
Seven Days of Preserves: Gayathri Kumar, Vaishali
30 Minutes Meals: Priya Mahadevan, Srivalli
Signature

April 20, 2011

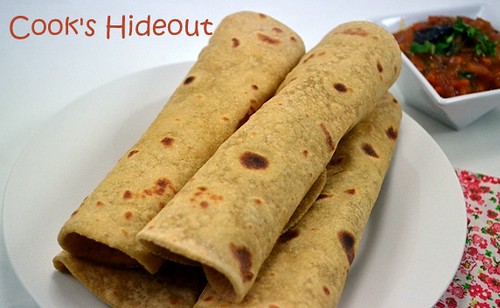
Multi Grain Rotis with Amma’s Tomato Soup

For day 3 of Blogging marathon, I made these simple rotis with a combination of different flours. I guess you can use any combination of flours to make these healthy rotis. I used atta (whole wheat flour), soy, besan (chickpea flour) and jowar flours.

Multi grain Roti

What did I learn: Sky is the limit for making Rotis
.

Ingredients:
Atta (Chapathi flour) – 2cups
Besan – ½ cup
Soy flour – ¼ cup
Jowar flour – ¼ cup
Salt – ½ tsp
Oil/ Ghee – as needed

Method:
  • Sift flours and salt together in a large mixing bowl. Add warm water, little at a time, to the flour and mix and knead into smooth dough. Knead for about 5-8 minutes.
  • Cover with plastic wrap, damp paper towel or kitchen towel and rest for 20-30 minutes. Divide the dough into 8-10 equal parts.
  • Roll each dough ball into 5-6” disc.
  • Cook on pre-heated skillet (tawa) until brown spots are formed on both sides, about 2 minutes per side. Spread oil or ghee while cooking for added flavor (optional).
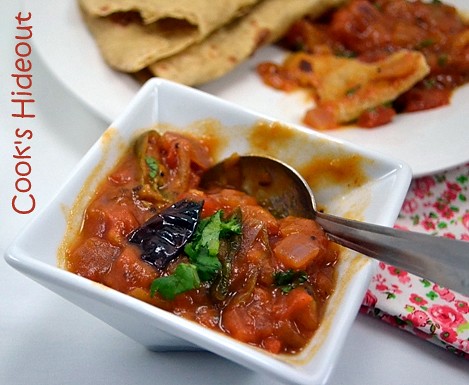
Serve hot with my Mom’s tomato soup. This is not your typical tomato soup; I’m even not sure why my Mom calls this a soup. It is actually tomato curry thickened with rice flour, it tastes great with rotis or puri. Only change I made is to add some tomato paste to jazz up the bland tomatoes we get here and to give the curry some more tomatoey flavor.

Multi grain Roti2

Amma's Tomato Soup:
Ingredients:
Tomatoes – 4 medium, chopped
Onion – 1 medium, chopped
Green chilies – 2, slit vertically
Tomato paste – 1tbsp
Red chili powder – ½ tsp (or to taste)
Garam masala – ½ tsp
Turmeric – ¼ tsp
Rice flour – 2tsp
Sugar – 1tsp
Salt – to taste

For tempering:
Chana dal – ½ tsp
Urad dal – ½ tsp
Mustard seeds – ½ tsp
Cumin seeds – ½ tsp
Curry leaves – 6-8

Method:
  • Heat 1tbsp oil in a sauté pan; add the tempering ingredients and once the seeds start spluttering, add onions, green chilies and sauté until the onions are lightly browned.
  • Add tomato paste and chopped tomatoes, cover and cook on medium flame until the tomatoes turn mushy.
  • Next add turmeric, red chili powder, garam masala, sugar and salt. Cook for 2 minutes.
  • Whisk rice flour with ¼ cup of water, making sure that there are no lumps.
  • Add the slurry to the tomatoes and cook until the curry starts to simmer and thicken, should take another 2-3 minutes. Garnish with coriander leaves and serve.
Tomato Curry

Lets see what my fellow marathoners BM#4 have been cooking up today.

Diabetes Diet/Management: Kamalika, Smitha, Suma
Kid Friendly Recipes: Anusha, Cool Lassi(e)
Seven Days of Soup: Priya Suresh
Seven Days of Indian Bread: Jayasree
Seven Days of Cakes:Priya Vasu
Seven Days of Preserves: Gayathri Kumar, Vaishali
30 Minutes Meals: Priya Mahadevan, Srivalli
Signature

April 19, 2011

Lachcha Paratha

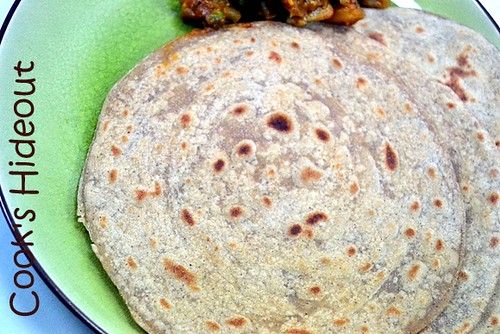
Day 2 of Blogging Marathon #4: As I mentioned in my previous post, my roti rolling skills need to be honed too. I prefer not to make triangular or any other shaped rotis since (I think) that involves certain skill, which I firmly believe, I lack. But for today’s post I made a flaky unleavened, folded and rolled paratha recipe that was much easier to make than I thought.

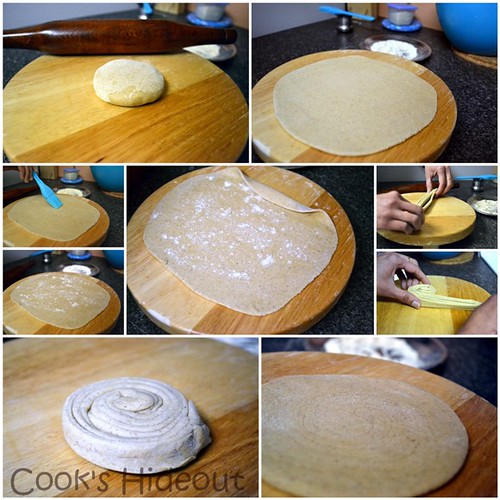
Dough is similar to regular roti, but when rolling it is folded like a Chinese hand-fan or saree pleats, then rolled and cooked like regular roti. Valli actually posted a recipe for it @ Beyond Curries a while back.

Lachcha Paratha1

What did I learn: Making Lachcha parathas is not as difficult as spelling them.

Ingredients:
Atta (Whole wheat flour) – 3 cups
Salt – 1 tsp
Ghee (Shortening) – 1tbsp

Method:
  • Add ghee and salt to the flour and work it in, so the flour resembles crumbles. Slowly add hot water to the flour, mixing steadily to make smooth, pliable dough. (I used about 1 to 1¼ cups of water). Cover with plastic wrap or damp paper towel and set aside for 30 minutes.
  • Divide the dough into 8-10 equal pieces.
  • Roll 1 piece into a 6” circle (or similar shaped), then start folding it from one end like saree pleats or Chinese hand-fan. Next roll the folded log tightly into itself. Press on the top lightly and gently roll out into a 6” circle.
  • Lachcha Paratha-Collage Small
  • Cook on a preheated skillet (tawa) until brown spots form on both sides. Add some oil/ ghee while cooking (optional). Serve hot with any spicy curry.
I served mine with Aloo-gobhi (Potato-Cauliflower in creamy cashew butter gravy).

Lachcha Paratha

Lets see what my fellow marathoners BM#4 have been cooking up today.

Diabetes Diet/Management: Kamalika, Smitha, Suma
Kid Friendly Recipes: Anusha, Cool Lassi(e)
Seven Days of Soup: Priya Suresh
Seven Days of Indian Bread: Jayasree
Seven Days of Cakes:Priya Vasu
Seven Days of Preserves: Gayathri Kumar, Vaishali
30 Minutes Meals: Priya Mahadevan, Srivalli
Signature

April 18, 2011

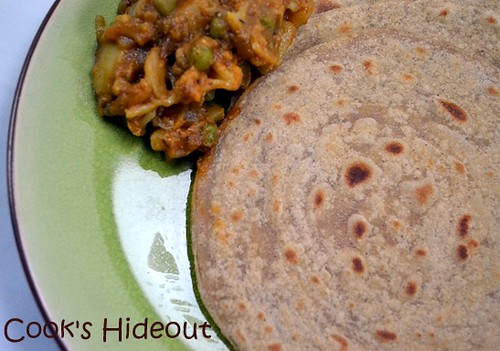
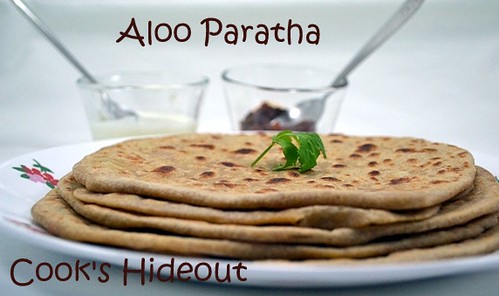
Aloo Paratha

I have nothing to boast about my roti making skills. I have to kick myself in the back for not even trying to watch and learn when my mom made rotis. I couldn’t even roll a roti (I’m not too confident even now, to be honest) until my husband taught me how to. He used to make rotis for us and slowly I started learning and making them on my own. Both of us are not big roti eaters and frankly during the week I don’t have time to make them. When my MIL visits us, she makes the rotis since I don’t want to embarrass myself with the outcome. I only have a couple of recipes that work well for me and with my limited skills I avoid any recipe that has any complicated instructions like stuffing, folding etc.

So when Valli announced that “Indian Breads” was one of the themes for4th blogging marathon, I decided to challenge myself and make 7 different types of Indian breads that I’ve never made before. For the next one week I’ll be posting my roti successes and mishaps as they occur in my kitchen. I found an excellent site by Yogi Gupta that has detailed recipes for a ton of Indian dishes along with a whole section on Indian breads. Most of my trials are from this website.

Aloo Paratha

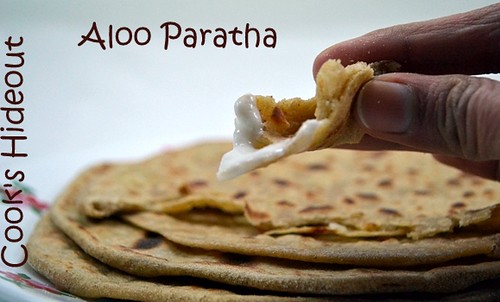
As I mentioned earlier, I’m trying to make (and learn) 7 different types of Indian breads that involve stuffing, rolling, using different flours, leaveners etc. To start of my Blogging Marathon #4 (Group 3), I made this basic Aloo Paratha – Potato Stuffed Indian Bread. I was skeptical about filling oozing out and rotis turning into disks, but the end result were soft yummy parathas that were just perfect (for my standards).

What did I learn: Making Stuffed parathas is not Rocket Science.

Ingredients:
Atta (Chapati flour) – 3 cups
Salt – ½ tsp Ghee – 2tbsp (I used vegetable shortening instead)
Water – 1 cup (or as needed)

Filling:
Potatoes – 3-4 medium, boiled and mashed
Red chili powder – ½ tsp (or to taste)
Lime juice – 1tbsp
Ghee – 1tbsp (optional)
Salt – to taste

Aloo Paratha

Method
:
  • Sift flour, salt and red chili powder. Add ghee and rub into the flour mixture until it forms crumbs. Add water and knead to make soft and smooth dough. Cover dough with a damp paper towel or plastic wrap for about an hour.
  • In the meantime, make the filling by mixing all the ingredients under “Filling”, this should have the consistency of dough. Divide the filling mixture into 8 equal parts.
  • Divide the dough into 8 equal parts.
  • Roll out the dough to about 4-5” diameter circle. Place the one of the filling part in the center. Pull the dough around the filling to cover and forms a ball. Gently flatten the dough ball with the fill and roll out carefully to form a 6” diameter circle.
  • Heat tawa and cook the paratha for about 1 minute; flip over and cook for another 1 minute. Brush some ghee/ oil on the top surface; flip and cook for another 1 minute. Brush the other side with ghee/ oil and cook for another 1 minute. So it takes about 4 minutes to make the paratha with each side cooked for 2 minutes each.
  • Remove on a clean kitchen towel, cover until all the parathas are made. Serve with yogurt and pickle.
Aloo Paratha

Lets see what my fellow marathoners BM#4 have been cooking up today.

Diabetes Diet/Management: Kamalika, Smitha, Suma
Kid Friendly Recipes: Anusha, Cool Lassi(e)
Seven Days of Soup: Priya Suresh
Seven Days of Indian Bread: Jayasree
Seven Days of Cakes:Priya Vasu
Seven Days of Preserves: Gayathri Kumar, Vaishali
30 Minutes Meals: Priya Mahadevan, Srivalli
Signature

April 14, 2011

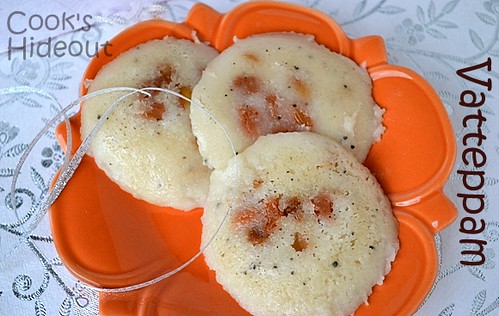
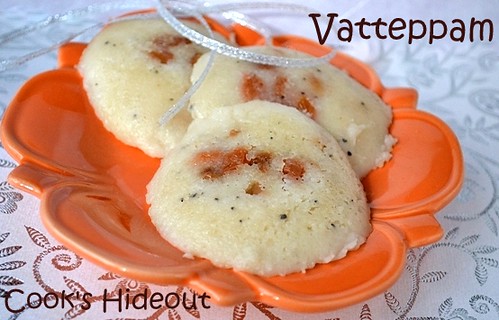
Vatteppam for ICC-March

For this month’s Indian Cooking Challenge, Valli chose a delicious rice cake dish from Kerala, Vatteppam. Recipe is courtesy from an Keralite who knows her rice cakes very well, SHN @ Kitchenmishmash. SHN’s pictures are breathtaking and when I saw her mouthwatering pictures of Vatteppam, I wanted to try and make them right away and for the first time ever, I made them almost 2 weeks before the deadline.

I halved the recipe, since I was making for just the 3 of us at home and I made them in idli stand instead of a round mold. I also used coconut milk instead of fresh grated coconut as I didn’t have any fresh coconut on hand. I really loved the sweet, spongy, yeasty treat. Thanks to Valli for choosing the dish and to SHN for providing the detailed recipe.
Vatteppam for ICC-March 2011

Here's how I made these delicious Rice cakes:
  • Soak ½ cup of Raw Rice (Par boiled rice) for 6-8 hours. Then grind the drained rice with about 1-2tsp water to make a coarse paste.
  • Set 2 tbsps of the coarsely ground rice to the side.
  • To the remaining rice, add 1/3 cup coconut milk and grind to a fine paste.
  • Next add 1tbsp cooked rice (I used cooked brown rice) and ¼ cup of water to make a batter that is as thick as idli batter.
  • Cook the coarsely ground rice with 1/3 cup of water. Bring the mixture to a boil in a small saucepan and simmer until it gets to porridge consistency. Set aside to cool.
  • In the meantime, proof ¼ tsp yeast by adding it to ¼ cup luke warm water and 1tsp sugar. Set aside in a warm place to foam up.
  • Once the rice porridge is cool enough to handle, add 2tbsp of it to the blender with the rice and coconut batter and blend well until combined.
  • Finally add the frothy yeast solution and blend until mixed well.
  • Pour the batter in a glass/ steel container and leave in a warm place for about 8-12 hours to ferment. Choose a container that can hold about double the batter once it rises.
  • After the batter has doubled and fermented, add 1/3 cup sugar, mix gently and set aside to ferment for another1½ - 2 hours.
  • In the meantime, fry some cashews and raisins in ghee until golden brown and plump. Set aside.
  • When ready to steam, add the fried cashews and raisins and 1tsp of ground cardamom (elaichi).
  • Mix well and pour into greased idli molds. Steam in a pressure cooker for 20-25 minutes until a toothpick inserted in the center of the cake comes out clean.
Kerala Steam Rice Cakes: Vatteppams for ICC-March
Cool completely before enjoying them.
Signature

April 11, 2011

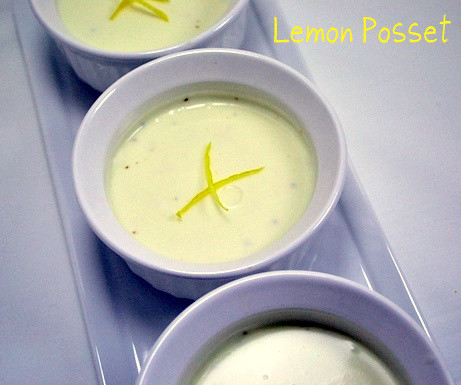
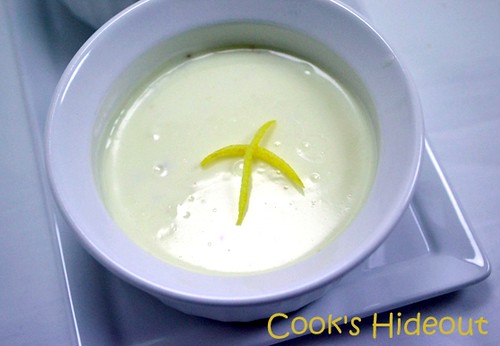
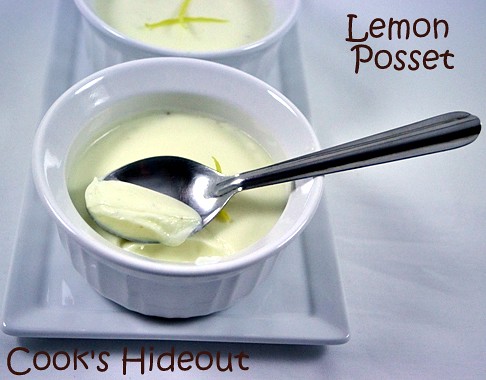
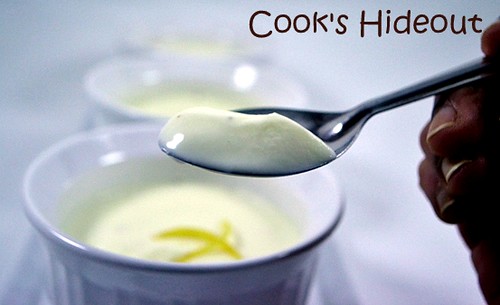
Lemon Posset-A Quick & Easy Summer dessert

This has to be the most decadent and the easiest dessert that I’ve ever made. With only 3 ingredients and about 10 minutes of hands-on time, it’s hard to believe the end result could be this tasty AND the technique is almost fool-proof.
When I saw this recipe on the stone soup blog with mouth watering pictures, I know I was going to make it very very soon. And the minute I saw I had some heavy cream leftover after making mango ice cream (recipe following soon), I made it and was not disappointed at all.

Lemon Posset3
Recipe adapted from the Stone Soup blog:
Ingredients:
Heavy Cream – 2 cups
Sugar – 2/3 cups
Lemon juice – 5tbsp
Ground Cardamom (Elaichi) – 1tsp

Method:
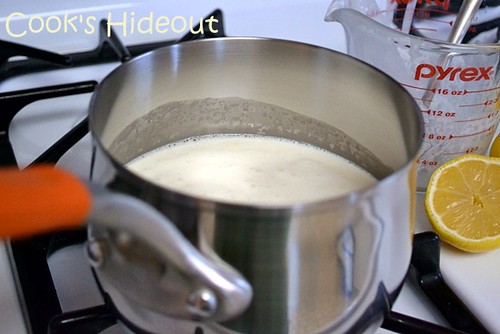
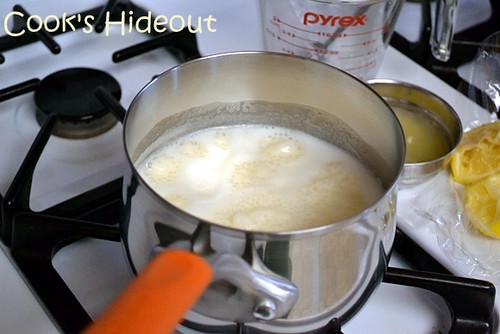
  • Whisk cream and sugar together and bring to a boil on medium heat.
  • Simmer for 3 minutes.
  • Turn off the heat and stir in lemon juice and elaichi. Cool for 10 minutes.
  • Pour into individual ramekins or bowls. Chill for at least 6-8 hours or overnight.
Here's a Pictorial for making Lemon Posset.

Lemon Posset

Lemon Posset1

Lemon Posset2

Lemon Posset4

Lemon Posset5

Enjoy this refreshing, lemony dessert anytime of the day and any season of the year. I think this
will be perfect dessert for summer bbq parties.
This goes to Aipi's Bookmarked Recipe Every Tuesday event - 36th edition.
Signature

April 07, 2011

White Pumpkin & Swiss Chard Curry

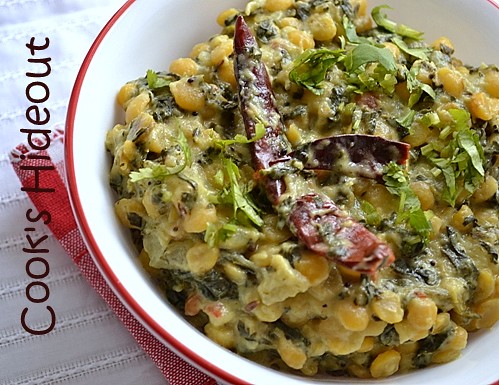
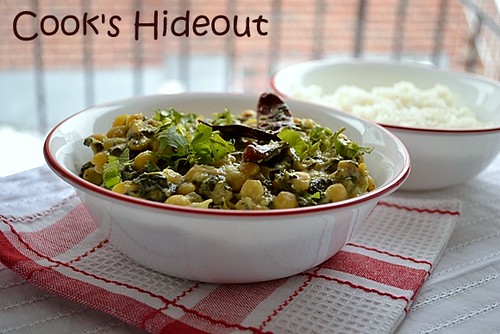
White pumpkin (Gummadikaya in Telugu) is a very versatile veggie and can be used to make dals, curries and stews. This time around I had a bunch of Swiss Chard that needed to be used up, so I added it to the curry to boost the nutrition. To make the curry creamy and not make it too dry, I added coconut cream, the top layer in unshaken canned coconut milk. All in all the curry turned out to be quite tasty.

Swiss Chard-Pumpkin Curry

Here’s how I made it:
Ingredients:
White Pumpkin – 3 cups, diced into 1” cubes (Zucchini should be a good substitute)
Swiss Chard – 1 small bunch, chopped
Chana dal – ½ cup, soaked in water for at least 30 minutes
Green chilies – 3, sliced
Coconut cream – 1tsbp, just skim the thick cream that forms on the top of regular coconut milk can
Turmeric – 1/8 tsp

For tempering:
Mustard Seeds – 1tsp
Cumin seeds – 1tsp
Dry red chilies – 3

Method:
  • Microwave pumpkin with ½ cup water until tender.
  • Heat 2tsp oil in a sauté pan; add the tempering ingredients and once they splutter add green chilies, soaked chana and cooked pumpkin with any leftover water after microwaving.
  • Mix well and add the chopped chard. Cover and cook till chard is wilted and the dal is completely cooked.
  • Add coconut cream and salt, simmer for another 2 minutes.
Swiss Chard-Pumpkin Curry1

Serve with steamed rice or roti.
Signature

April 04, 2011

Quick Tomato Peanut Chutney

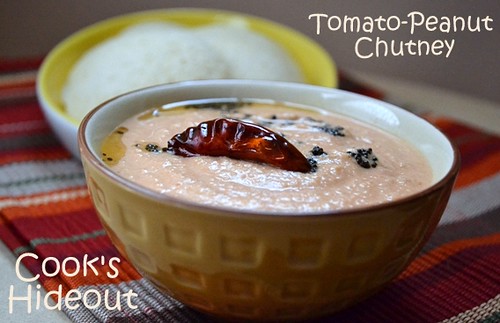
I don’t know if I like weekends or not. It seems like they fly by faster than a weekday and I always end up wondering on Sunday night, what the heck I did in the last 48 hrs. My mind is buzzing with things to do for the weekend on Friday night, but come Saturday morning, all planning and to-do lists get scraped and NOTHING gets done. It’s like “Busy with no business”.

This post is not about my “nothing got done weekend”, but about “at last something got done weekend”. So I was very proactive on Friday morning; soaked some urad dal and parboiled rice for idlis, prepared the batter that night and left it to ferment until Sunday morning (With the cold Northeast winter weather, it takes about 24 hrs to have a nicely fermented batter).

But on Sunday morning I was short of time to make my usual peanut-coconut chutney, so I made this equally tasty and quick chutney that my mom usually makes. I keep store-bought unsalted roasted peanuts in my pantry all the time, but if you don’t have these, simply roast some in the microwave for 2-3 minutes.

Tomato Chutney
Ingredients:
Tomatoes – 2 medium, chopped into big chunks
Green chilies – 2, slit
Garlic – 1 clove, crushed
Roasted Peanuts – ¼ cup
Tamarind extract – 2tsp (or more to taste)
Salt – to taste

For tempering:
Mustard seeds – ½ tsp
Dry red chili – 1
Curry leaves – 4-6 (I didn’t have any on hand)

Method:
  • In a microwave safe bowl, take tomatoes, garlic and green chilies and microwave covered for 3-4 minutes until the tomatoes turn into a mush.
  • Remove and cool for a little bit before grinding them into smooth chutney with the peanuts, tamarind extract, salt and water (use as needed).
  • When I don’t have time to wait for the tomatoes to cool, I use my immersion blender and blend all the ingredients while still hot.
  • Heat 1tsp oil in a small saucepan and add the mustard seeds and dry red chili; once the seeds start to splutter, add to the chutney, mix well and enjoy with your pillow-soft idlis* or crispy dosas.
Chutney keeps well in the fridge for at least 3-4 days.

Tomato Chutney2

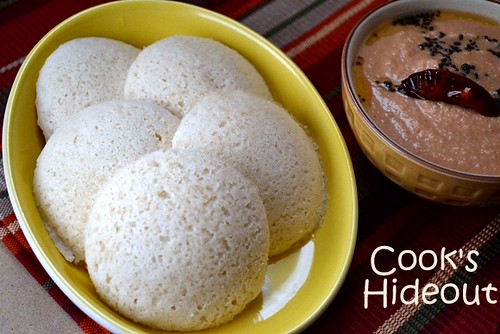
* To make Idlis: Soak 1 cup Urad dal (Minapappu) and 2 cups Parboiled rice separately for 4-6 hours. Grind dal into a smooth paste using little water, next grind rice into a coarse paste. Mix them together with 1tsp salt and set aside until frothy and fermented (about 8-12 hours in warmer temps or up to 24hrs in colder weather).

Tomato Chutney1

Since this is a bookmarked recipe, courtesy Amma, I'm sending this chutney off to Aipi's Bookmarked Recipe-Every Tuesday event.
Signature

Wish you a very Happy Ugadhi/ Gudi Padwa

Sri Khara naama samvatsara Subhakankshalu
Wish you all a very Happy Ugadhi/ Gudi Padwa

Signature

LinkWithin

Related Posts Widget for Blogs by LinkWithin
Blogging tips